Friday, March 25, 2011

BasicGrey Recycled Challenge


Ah the 80's, the time that style forgot! That's me in the pink, black and white party dress! I wanted to scrap this photo of my 3rd birthday because I think I look like a proper brat in it! The BasicGrey Challenges blog encouraged me to recycle some things with their recent challenge. I had lots of ribbons that had been used to wrap up some things I bought online. They weren't great quality but were pretty so I decided to make little ribbon flowers out of them. I really like how they turned out and they didn't take too long. To make them, I punched out a circle, covered it in really sticky tape (use Scor-tape or ATG gun) and stuck the end of a ribbon to it. Then you just keep twisting the ribbon in a circle and sticking it down firmly. I added some Prima bling to the centres to finish them off. The number 3 is die cut from PTI Raspberry Fizz felt and the letters are a selection of American Craft Thickers. The little russian dolls strip is a roll of patterned sticky tape I got from Accessorize in the sales. The background paper is from the Basic Grey Sultry collection. Thanks for looking!

Wednesday, March 23, 2011

Enjoy the Journey

 Such a beautiful day in Ireland today. The sun is shining and it feels like the middle of Summer. I was able to test my new tripod and take pictures of my cards outside today. Without sounding like I'm complaining, I think it was a little too bright to take pictures! This first card was made for my friend who is moving away to start a new job. I used my Newsprint background stamp from PTI and stamped it with Memento London Fog ink on Ocean Tides card stock. The frame is die cut and stamped using Fillable Frames #10. The sentiment (kinda hard to see in this picture) reads "Enjoy the Journey" and is from American Crafts. The inside of the card reads "You deserve it!" (sentiment from PTI's Say it with Style) The bakers twine is from The Twinery and the button is from my stash.

 This next card is made using a Papermania card base, onto which I stamped Hero Arts ledger stamp in Memento's Rosebud ink. I die cut some AC cardstock in Mat Stack #5 and topped it with a Limitless Layers circle die cut in Raspberry Fizz cardstock and one in felt. Then I added a butterfly diecut and a button tied with bakers twine. The Congrats sentiment is from Say it with Style and the smaller sentiment is from Inside and Out Baby.

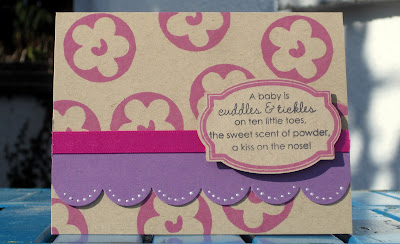
I ordered a few supplies from Addicted to Rubberstamping last month and they threw in a free gift of a little flower sponge stamp. I used it on this card to stamp directly onto the cardbase. I used the Mat Stack #10 again and stamped a sentiment from Inside and Out Baby on it. The border is punched with an EK Success punch and I used Perfect Pearls to accent the scallops. Thanks for looking!

Monday, March 21, 2011

A New Addition to my Craft Room

Well I have been missing for over a week and I kinda have a reason for it! My Cuttlebug broke the Saturday before last and along with died any creative urges whatsoever! I spent all of last week researching new machines and wasn't sure if I should stick with what I knew or try something different. After having my attention brought to Spellbinders new machine, the Grand Calibur, I kept coming back to it again and again. The reason being, it has cutting plates that are A4 in size! So after much deliberation (it's €140 yikes!) I ordered it from CardznScrapz and it arrived today! Here it is in all it's glory (it's actually a dark pink, not red)


The three plates- Base plate A, Embossing plate B and Cutting plate C + tan mat.


Look at all the dies you can cut in one go!!
I am so impressed with this machine. The sandwich runs through really smoothly and gives a really clean cut. You can pack all your dies in close together and really get the most out of your card stock. The only downside is it doesn't take any of the Sizzix Bigz or Original dies, so if you have these dies you will still need your Cuttlebug/ Big Shot for these. 
Hopefully my creative flow will return with this little beauty in my craft room! 

Wednesday, March 9, 2011

A Clean and Simple Card.


I needed a quick card for an order so I used my new Tiny Treats frame stamp from PTI. This stamp set comes with a matching die which makes everything a lot easier! I stamped it using Memento Rosebud ink and then die cut a scalloped circle using the Limitless Layers 1 3/4 circle die. The letters are AC Thickers and the ribbon is from The Ribbon Girl. Bling is from Basic Grey. A quick card which took about ten minutes to make! Thanks for looking :)

Tuesday, March 8, 2011

Cased Card.


I'm sure most of you are very familiar with Dawn McVey's work. The woman is a hands down genius when it comes to crafting! When I saw this card on her blog, I fell in love and just had to recreate it. So I bought the Hero Arts Starburst, Starburst Lace and Ledger stamp all in one go! They arrived today along with some PTI goodies and so I got to work. I didn't change the layout of it at all and just added and removed a few other little bits. I needed a 50th birthday card, so I used my new PTI numbers dies (which are amazing by the way!) Everything is stamped in Memento Rosebud ink and the edges are inked in Tim Holtz Antique Linen. I also added a PTI flower cut from Raspberry Fizz felt and an old button. Please pay no heed to the wonky cutting of the medallions. I'm a leftie and I find it so hard to cut delicate shapes out! Thanks for looking and please do check out Dawn's blog; she is amazing!

Happy Birthday Lou!

Another card I made on Sunday but I couldn't share it until Lou's birthday today. Hopefully it has already arrived! I used my Hero Arts peacock stamp again, this time using Memento Bahama Blue ink. I distressed and inked it and then layered it on Basic Grey Marrakech paper. Love the blues and oranges in this set. I attached it all to a card base made from PTI's soft stone card. The card is finished with some Kaisercraft gems, grosgrain ribbon from The Ribbon Girl and an orange button. I am fairly rubbish at tying ribbons so I just stuck a strip of ribbon onto the card and then folded and stuck two other pieces of ribbon to look like a bow. I would like to enter this card into the Simon Says Stamp Challenge (1 image, 2 patterned papers, 3 different embellishments)

Monday, March 7, 2011

Papertrey Ink Make it Monday

I have missed the last few Make it Mondays so I wanted to participate while this one is fresh in my mind! The theme is distressing edges. I used a kraft card base which I stamped with the library card stamp in Fresh Snow. I only inked the stamp once because I didn't want the lines of the image to be perfect. I diecut the notebook page twice in soft stone and some American Crafts paper and distressed the edges. The sentiment is from Everday Button Bits. Then using an old star chipboard shape which I distressed and inked, I attached an AC brad to the centre. The little brass charms are from a pair of earrings that were reduced to €0.50. Finally I wrapped some bakers twine around the notebook pages and inked all around the edges of the card. Thanks for looking!


Demons are a Ghoul's Best Friend!

This month's challenge on Creative Craft World is to use circles and I really loved the sketch they provided. So in my quest to use all my hoarded paper, I did this Halloween page. I adore the Basic Grey Eerie collection and used lots of it for this layout. I only have a 3" circle punch so I just roughly cut the other circles. And then because they were pretty rough, I distressed them and inked up the edges. The letters are a mixture of Euro shop foam letters, Basic Grey Eerie and Pink Paislee Pumpkin letters. I added a few matte black buttons to finish it off. This layout would have taken much less time if I had some more circle punches!

Close up of me and my friend Lou dressed up for Halloween!

Thursday, March 3, 2011

Get Well Soon

 I love this Hero Arts peacock stamp so much and I think it deserves centre stage on a card. The weathered and distressed look it gives is so delicate and pretty. I used Memento Bamboo Leaves ink to stamp the image, distressed the hell out of the edges and matted it onto some Basic Grey paper. I distressed it some more and used Tim Holtz ink on the edges. For the card base, I stamped a Music stamp from Purple Onion in Memento Pear Tart, added some ribbon and a sentiment from PTI. Thanks for looking!

A Card for a Mother

I made this card for my mother to give my granny. She is in hospital so she needs a bit of cheering up. I used my EK Success scallop punch on some My Mind's Eye paper. The paper stack was free with a cardmaking magazine a year or so ago. I stuck some buttons on to accent the scallops and added some AC Thickers. Very easy card to make. The hardest part was lining up the scallops. Thanks for looking!


Challenges: One Stich at a Time: A Card for a Mother

Challenge Card- St Patrick's Day

I have to honestly say this was so hard to do. I hate these colours together and it took me a few hours to come up with a pretty mediocre card! Anyway, I will have to post it after spending so much time on it! I used this lovely shamrock covered frame which is a free download from Mami Doodles. Then I stamped and embossed my pirate girl stamp from A Pirate's Life Bombshell stamp set. Love love love this stamp but I don't get a chance to use her too often. She is coloured in with Copics (badly might I add!) I stamped out one of the pirate hat stamps, coloured it in and turned it upside down to make a pot of gold. I used some UTEE to make the gold. To finish off, I added an orange ribbon tab and a white button threaded with bakers twine.

Challenges: Happily Ever Crafter: Tribute to St Patrick
Stamptacular Sunday Challenge: You've Been Framed